We’ve been paying close attention to the exciting development behind The Wand Company’s take on the classic Star Trek tricorder, the third entry their Original Series “Landing Party” line of prop replicas.
This month, the company showed off some very interesting looks behind the curtain as they continue the path forward towards the product’s final release.
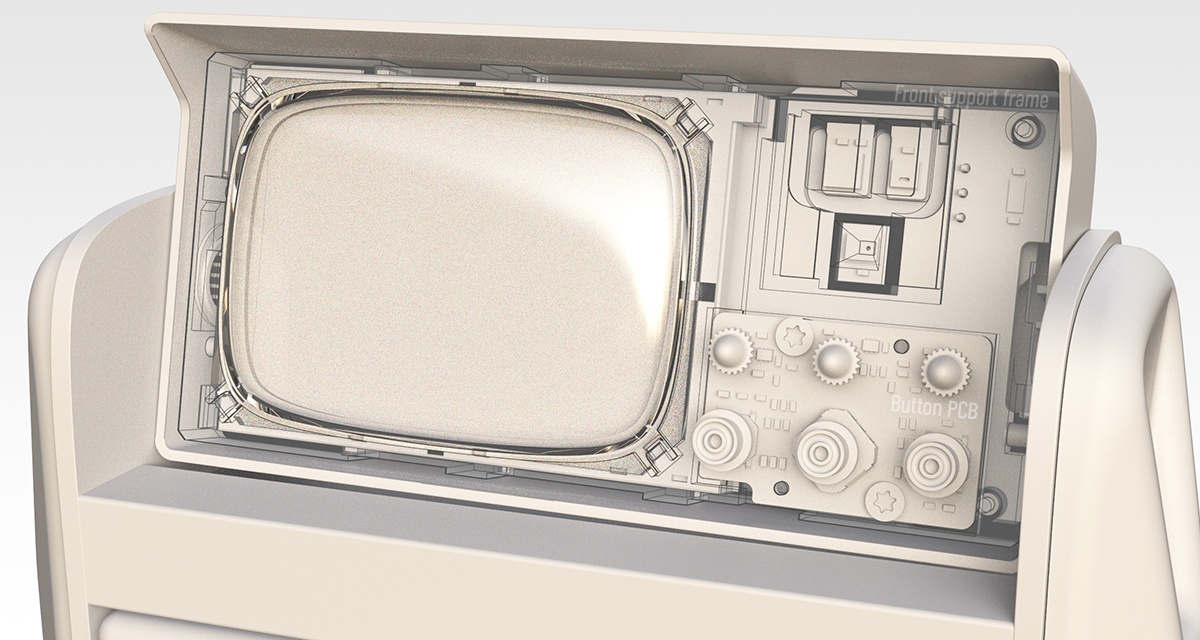
In their first April update, the company shares some of the detail behind taking their reference images, photographs, and scans of the original surviving Original Series tricorder prop, and using all of that combined data into a new digital model for 2021 manufacturing.
The high-resolution tricorder 3D scan data gives us an extraordinary opportunity to create a detailed and accurate replica that should… look and feel as much as possible like a real piece of equipment that had been issued to an Enterprise officer.
However, it is not as simple as just using the generated scan data to make a production product, although it is an excellent jumping-off point for our design.
For The Wand Company, the finished replica should not only follow the external dimensions and geometry of the original prop as closely as possible but also fulfil a number of other important criteria: it has to be manufacturable in volume, invisibly contain the components needed for it to be functional, be robust enough to be enjoyed as intended and used in one’s quarters and during away missions and, most importantly, create a rich experience for the owner which immerses them in the optimistic expanses of the Star Trek universe.
Naturally, decisions have to be made about how the tricorder will fit together and how everything needed to make it function can be squeezed into the form that was determined by Wah Chang, [but] even with a modern LCD, still a crowded place for the functions that we want to pack into it in 2021.
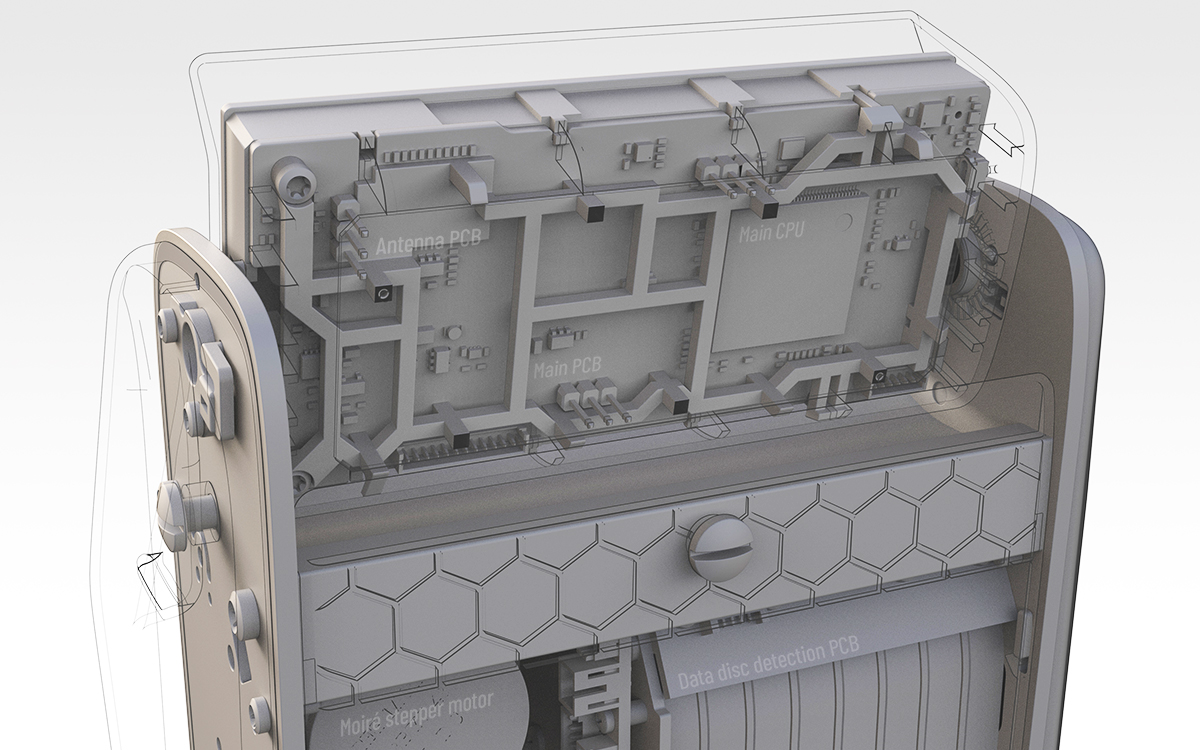
In addition to a number of shared images of their digital 3D model of the new classic Trek tricorder prop replica, the team also went into fine detail about the challenges faced with recreating the handmade, original prop — with dimensions meant to by symmetrical, yet are warped or damaged after decades — as a new design capable of being mass-produced with current factory materials and techniques, preserving Wah Chang’s original look and styling in the process.
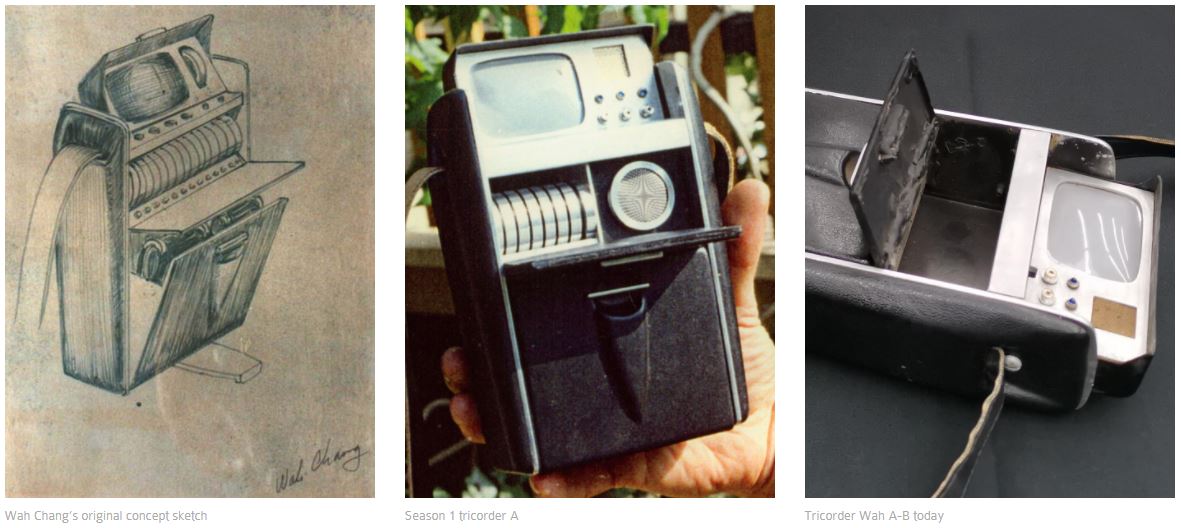
When studying the prop it was clear that some of the panels had become warped and one side panel was completely loose from its original position. All this is captured by the scan and that data is all imported into the CAD – the good, bad and the ugly. However, because I had also physically examined the hero prop, I was able to ascertain which aspects of it were part of the original design intent and which areas had become damaged or misshapen during the hero prop’s history.
With the scan geometry in CAD, I was able to make multiple sections through the data as well as overlaying what were intended to be symmetrical parts, for example the two side panels, so that I could then compare each part directly to find coherent features. Needless to say, there was quite a lot of this to work through which took a great deal of care and time to get to the model ready for production.
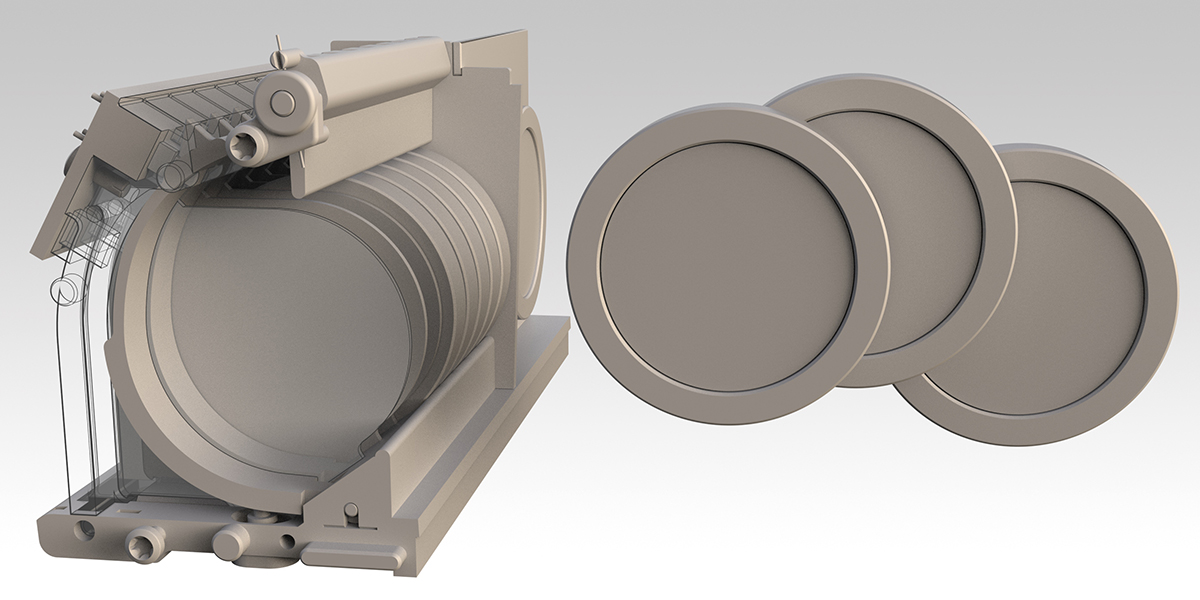
In an interesting development, The Wand Company also intends their tricorder prop replica to feature an ejecting series of data discs, where round tiles are able to be removed from the central storage bay using a servo mechanism — adding functionality to part of the prop only seen as ‘static’ on-camera.
The middle compartment of the hero prop, along with all the original details, was long-removed.
However, I could see the dried glue and the edges of the remnants where certain parts of the middle section had been held. Combining this with the scan data and original photos, I was able to more precisely calculate the sizing and geometry of those missing middle features. This allowed me to recreate those elements that were absent from the hero tricorder.
[One of the most rewarding parts of this project was] designing a working rack of removable data discs that would fit within the original geometry that Wah Chang conceptualized. (We will discuss this aspect of the design in more detail in a future post.)
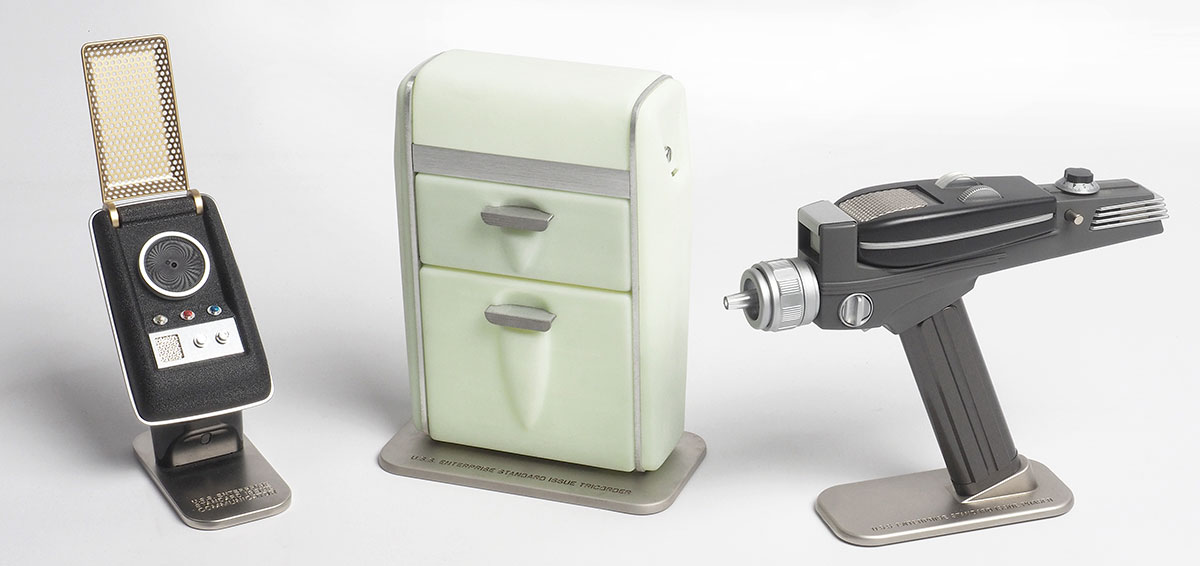
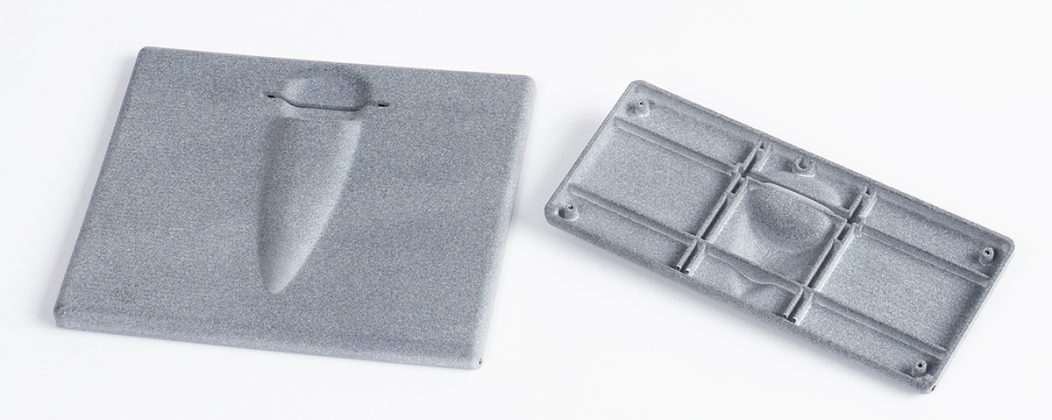
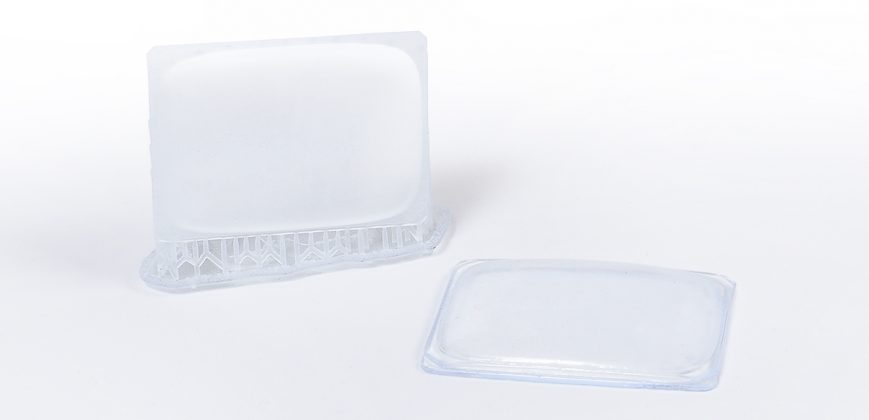
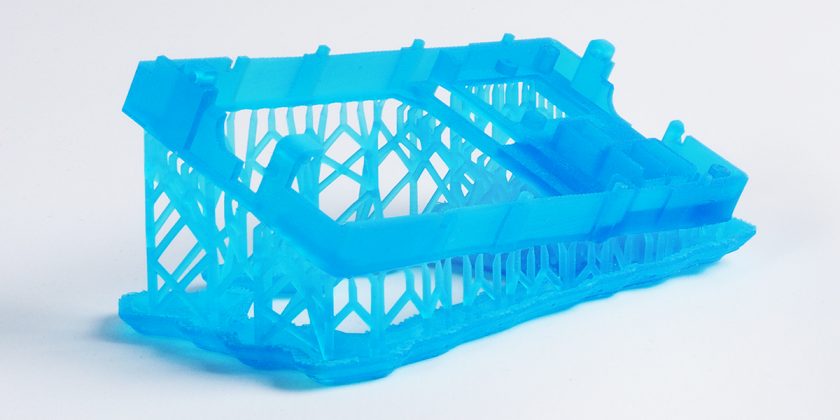
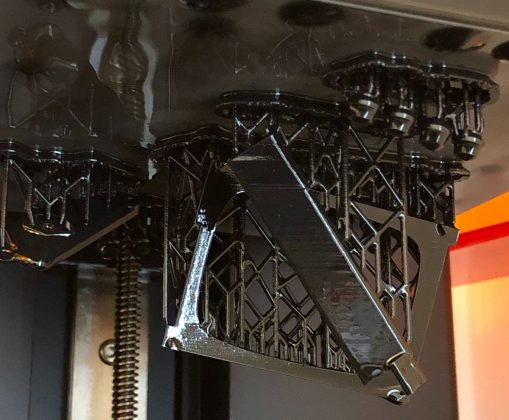
The company’s second April update focuses on their use of 3D printing technology in the tricorder’s prototype development stages, a vital process in their building and refinement of the prop replica’s final design.
Our tricorder CAD was a constantly evolving mechanical design for well over a year, as we pulled together all the elements that we wanted to fit inside the skin of this iconic prop.
Several of the early mechanical concepts required physical testing before being developed into a design that could be manufactured and 3D printing was a key part of this process. 3D printing allows us to quickly produce real parts in practically any shape we like, which could be difficult or even impossible to injection mould.
This is helpful, as we can get a concept made quickly which allows the parts to be tested in mechanisms before being tweaked and developed into models that are designed as production parts. Once the mechanical concept is tested, then the parts have to be designed so that they will be manufacturable in an injection mould tool with the associated limitations and essential draft angles.
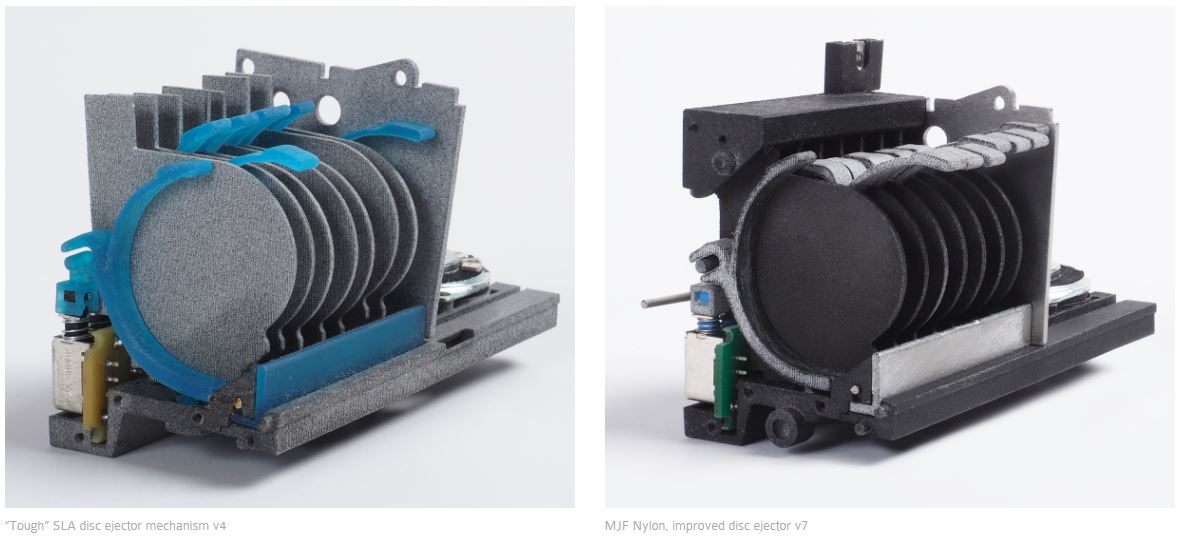 They also explained how all of the components for the tricorder went through multiple iterations in the design phase, using different materials for various testing processes.
For those of you who enjoy 3D printing as hobby, there are a bunch of interesting deep-dive technical details about their trial-and-error work, the machines and materiel they use, and so forth — read the full post for that fascinating insight!
To minimise the potential for changes this late on in the process and also, from the earliest point possible, to find out if the CAD design would work in the real world, each of the components have been 3D printed, often multiple times.
3D printing the tricorder has been critical in realising the design and understanding fully how it will fit together, be built on the production line and actually work in the hands of a user. Seeing the geometry turned into real 3D printed components assembled, all mechanically slotting into each other, truly brings the tricorder to life.
3D printing can only go so far, of course; while extremely helpful in the development of each component, it also helps the factory which will be building the final product understand what needs to be produced when the design is “locked” for the big day.
It’s not only us that need to see and feel the tricorder: our factory also makes use of rapid prototyping and Stratasys PolyJet 3D printing machines to get a better understanding of what they are going to have to manufacture.
A fully working prototype is essential for the factory to test the fit and build sequence and make sure that the CAD really works before tool cutting is started.
There are many aspects of the design that are very difficult to gauge from just looking at CAD on a screen or by testing functions with simulation software – for example, how bundles of cables are routed, what the detents on the hood opening action feel like in operation, or how the range of internal state sensors perform together.
It is usual for these factory models to be expensive and time-consuming to build and, more often than not, the process is repeated a number of times whilst the design is refined as issues are discovered and ironed out in subsequent revisions, which then also need testing. They are, however, a very necessary step towards full manufacture.
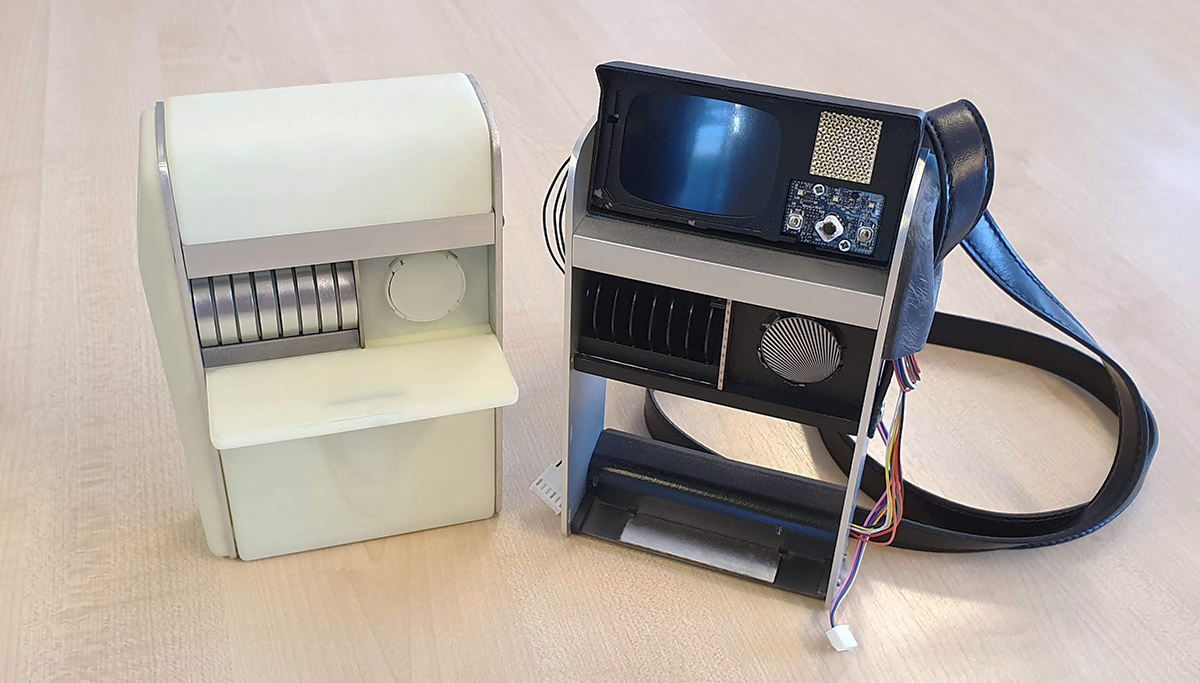
In addition to the plastic material which the final tricorder replica will contain as 3D-printed parts, there are also a great number of metal components and assembly equipment (springs, screws, pins, etc.) and hundreds of electronic bits to help it actually function.
The tricorder is constructed from a range of different materials, and in addition to 68 injection moulded parts which can be 3D printed, there are 22 metal parts, a number of different sized screws, bolts, springs, and magnets, a hand-stitched leatherette strap, and more than 350 electronic components assembled on to six printed circuit boards.
Where it is easier or more accurate to do so, many of the metal parts are created using traditional CNC machining, laser or waterjet cutting. For the tricorder’s side frame plates, we had access to a laser cutter which allowed us to initially cut acrylic sheet to shape to create quick prototype models in order to test our initial design concepts.
As soon as the design had been refined, the side plates were sent out to an external fabricator to be laser cut from aluminium.
![]()
With every new technical detail revealed, we get more and more excited about the final product The Wand Company will eventually be releasing — so if you’re as interested in this project as we are, keep checking back to TrekCore for all the latest updates!
If you’re interested in this classic Star Trek tricorder prop replica, you can register on The Wand Company’s website for more news on the project, and preorder availability, as things move closer to fruition.

